🕹️ Importing a Custom Robot
While OmniGibson assets includes a set of commonly-used robots, users might still want to import robot model of there own. This tutorial introduces users
Preparation
In order to import a custom robot, You will need to first prepare your robot model file. For the next section we will assume you have the URDF file for the robots ready with all the corresponding meshes and textures. If your robot file is in another format (e.g. MCJF), please convert it to URDF format. If you already have the robot model USD file, feel free to skip the next section and move onto Create the Robot Class.
Below, we will walk through each step for importing a new custom robot into OmniGibson. We use Hello Robotic's Stretch robot as an example, taken directly from their official repo.
Convert from URDF to USD
In this section, we will be using the URDF Importer in native Isaac Sim to convert our robot URDF model into USD format. Before we get started, it is strongly recommended that you read through the official URDF Importer Tutorial.
-
Create a directory with the name of the new robot under
<PATH_TO_OG_ASSET_DIR>/models. This is where all of our robot models live. In our case, we created a directory namedstretch. -
Put your URDF file under this directory. Additional asset files such as STL, obj, mtl, and texture files should be placed under a
meshesdirectory (see ourstretchdirectory as an example). -
Launch Isaac Sim from the Omniverse Launcher. In an empty stage, open the URDF Importer via
Isaac Utils->Workflows->URDF Importer. -
In the
Import Options, uncheckFix Base Link(we will have a parameter for this in OmniGibson). We also recommend that you check theSelf Collisionflag. You can leave the rest unchanged. -
In the
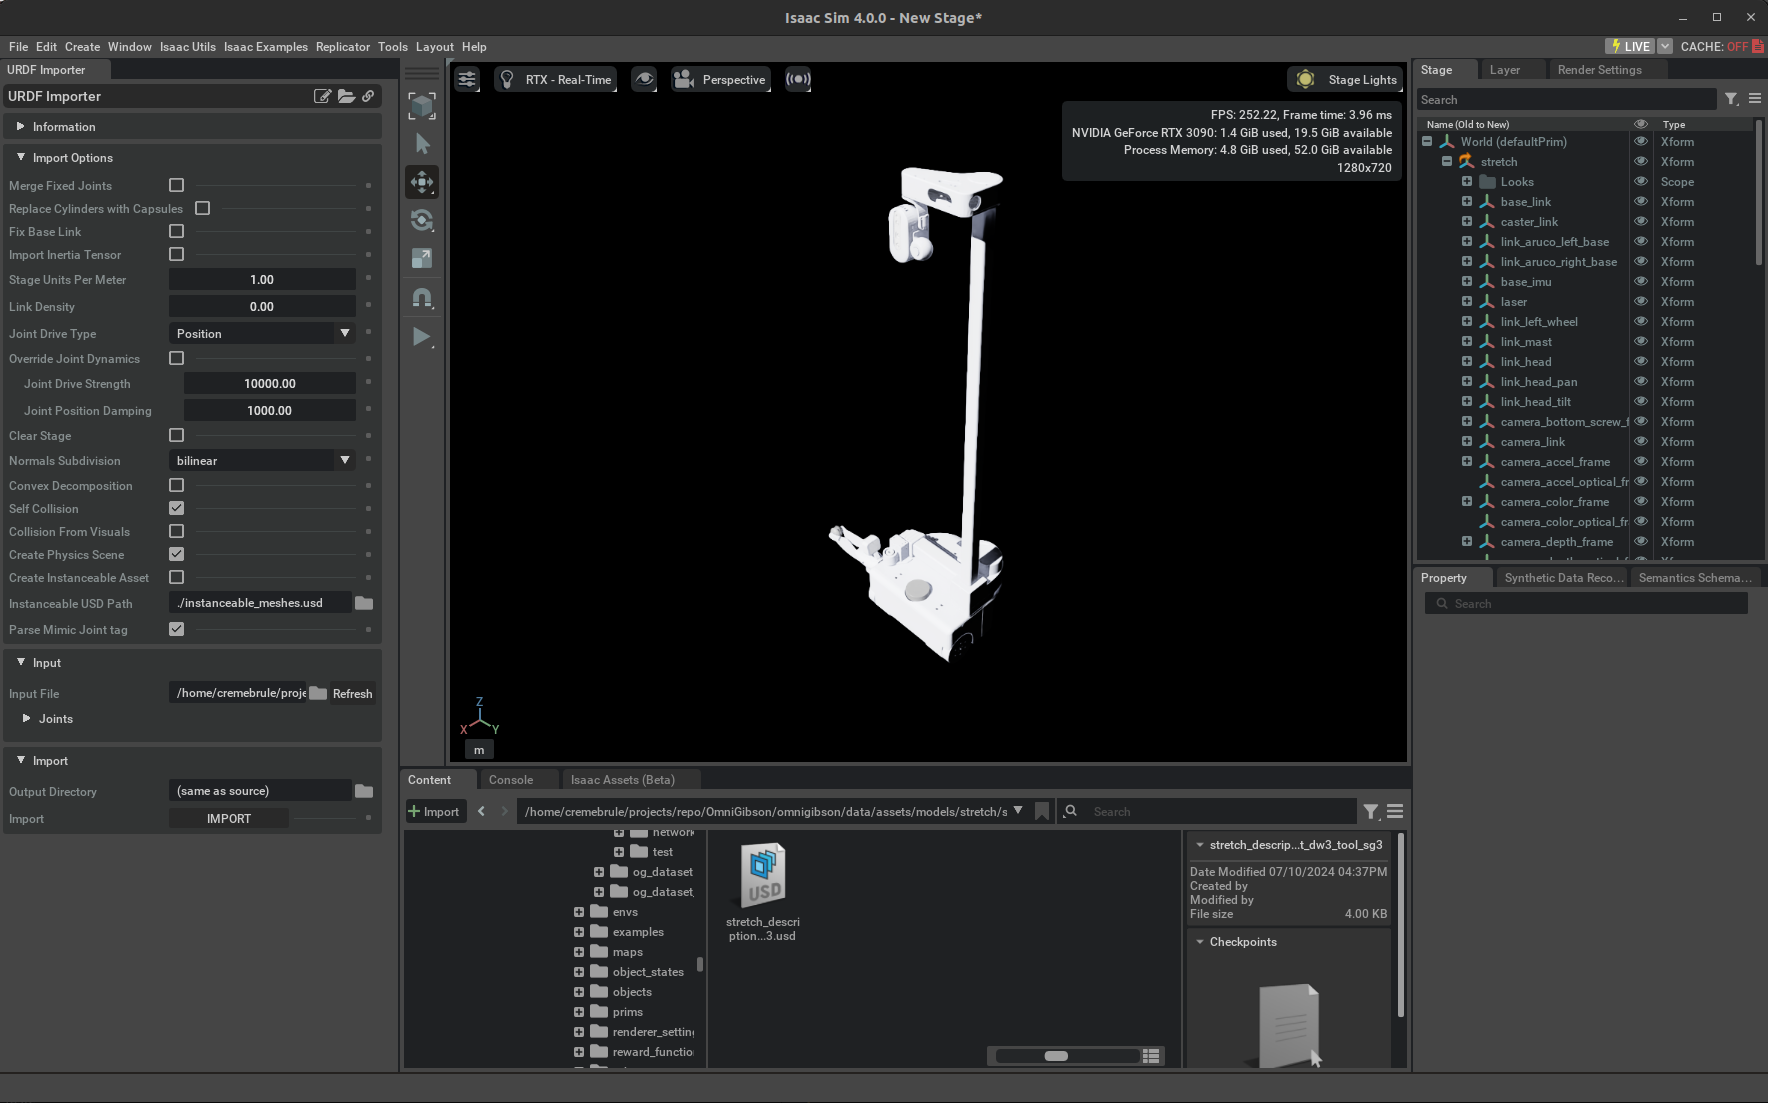
Importsection, choose the URDF file that you moved in Step 1. You can leave the Output Directory as it is (same as source). Press import to finish the conversion. If all goes well, you should see the imported robot model in the current stage. In our case, the Stretch robot model looks like the following:
Process USD Model
Now that we have the USD model, let's open it up in Isaac Sim and inspect it.
-
In IsaacSim, begin by first Opening a New Stage. Then, Open the newly imported robot model USD file.
-
Make sure the default prim or root link of the robot has
Articulation RootpropertySelect the default prim in
Stagepanel on the top right, go to thePropertysection at the bottom right, scroll down to thePhysicssection, you should see theArticulation Rootsection. Make sure theArticulation Enabledis checked. If you don't see the section, scroll to top of thePropertysection, andAdd->Physics->Articulation Root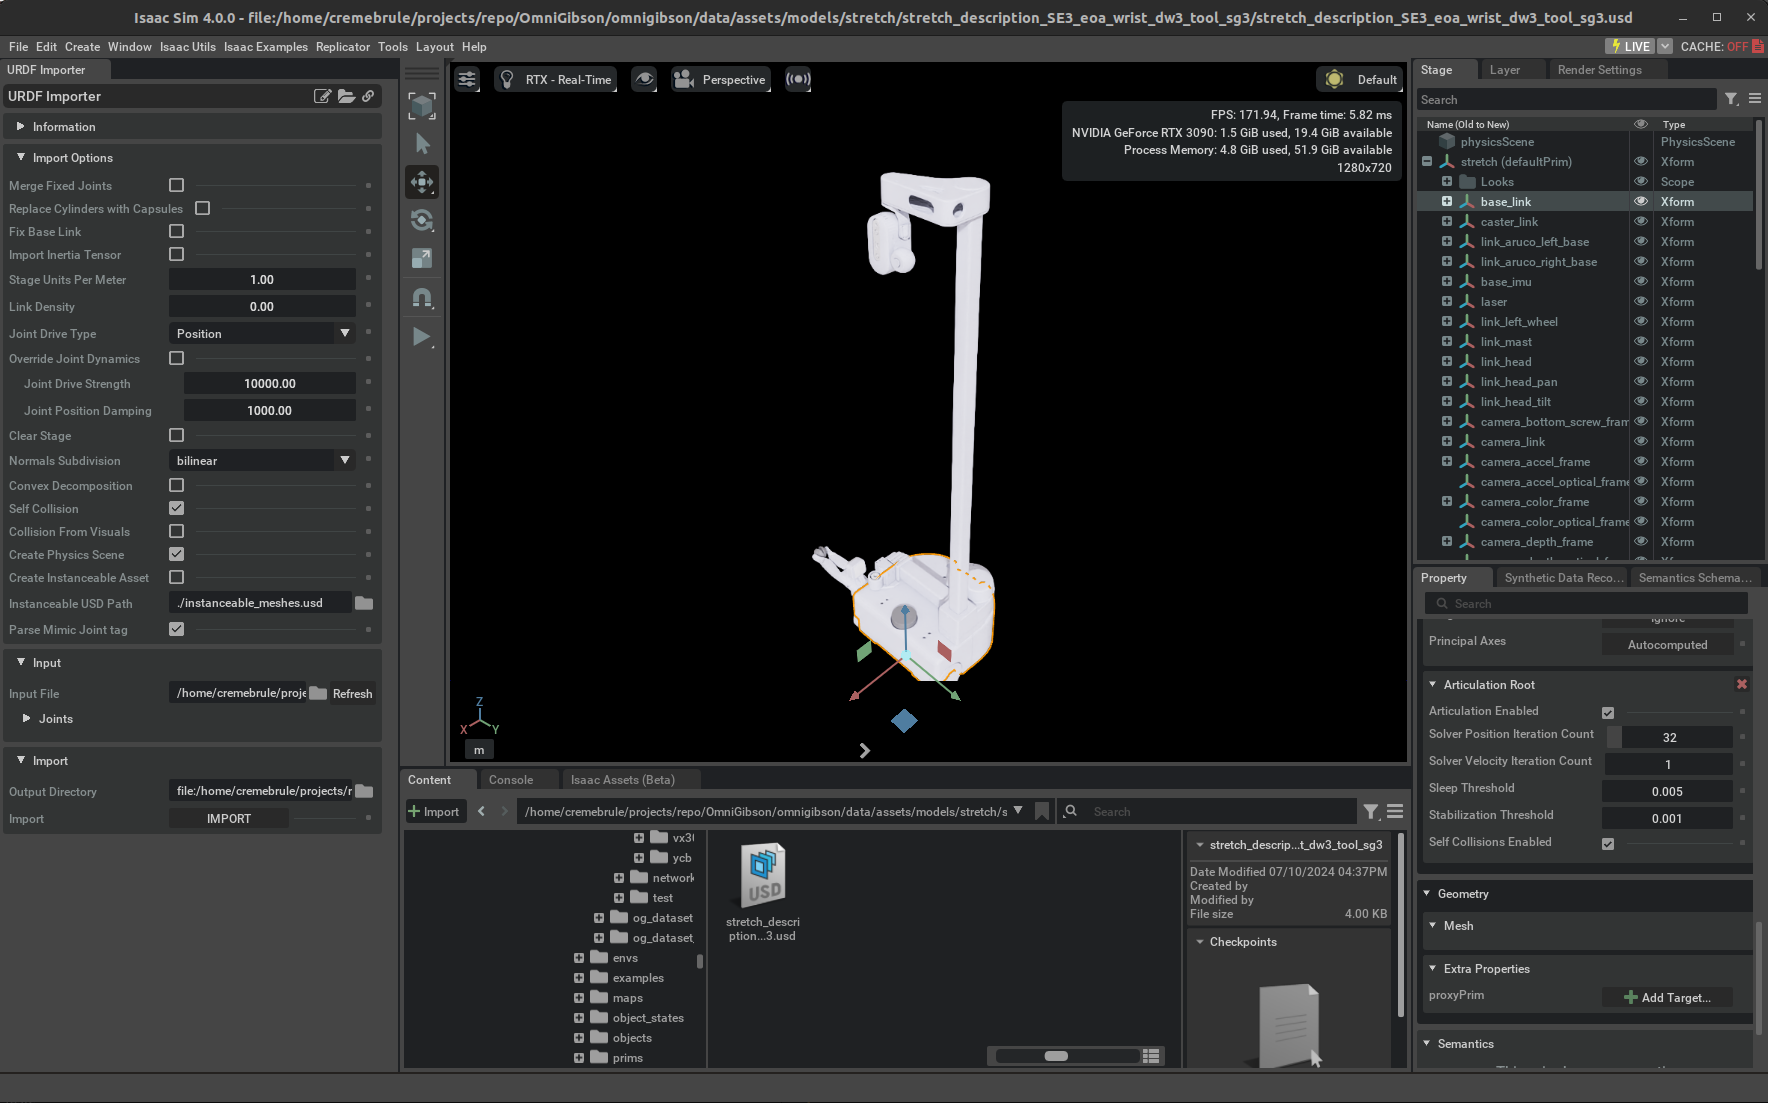
-
Make sure every link has visual mesh and collision mesh in the correct shape. You can visually inspect this by clicking on every link in the
Stagepanel and view the highlighted visual mesh in orange. To visualize all collision meshes, click on the Eye Icon at the top and selectShow By Type->Physics->Colliders->All. This will outline all the collision meshes in green. If any collision meshes do not look as expected, please inspect the original collision mesh referenced in the URDF. Note that IsaacSim cannot import a pre-convex-decomposed collision mesh, and so such a collision mesh must be manually split and explicitly defined as individual sub-meshes in the URDF before importing. In our case, the Stretch robot model already comes with rough cubic approximations of its meshes.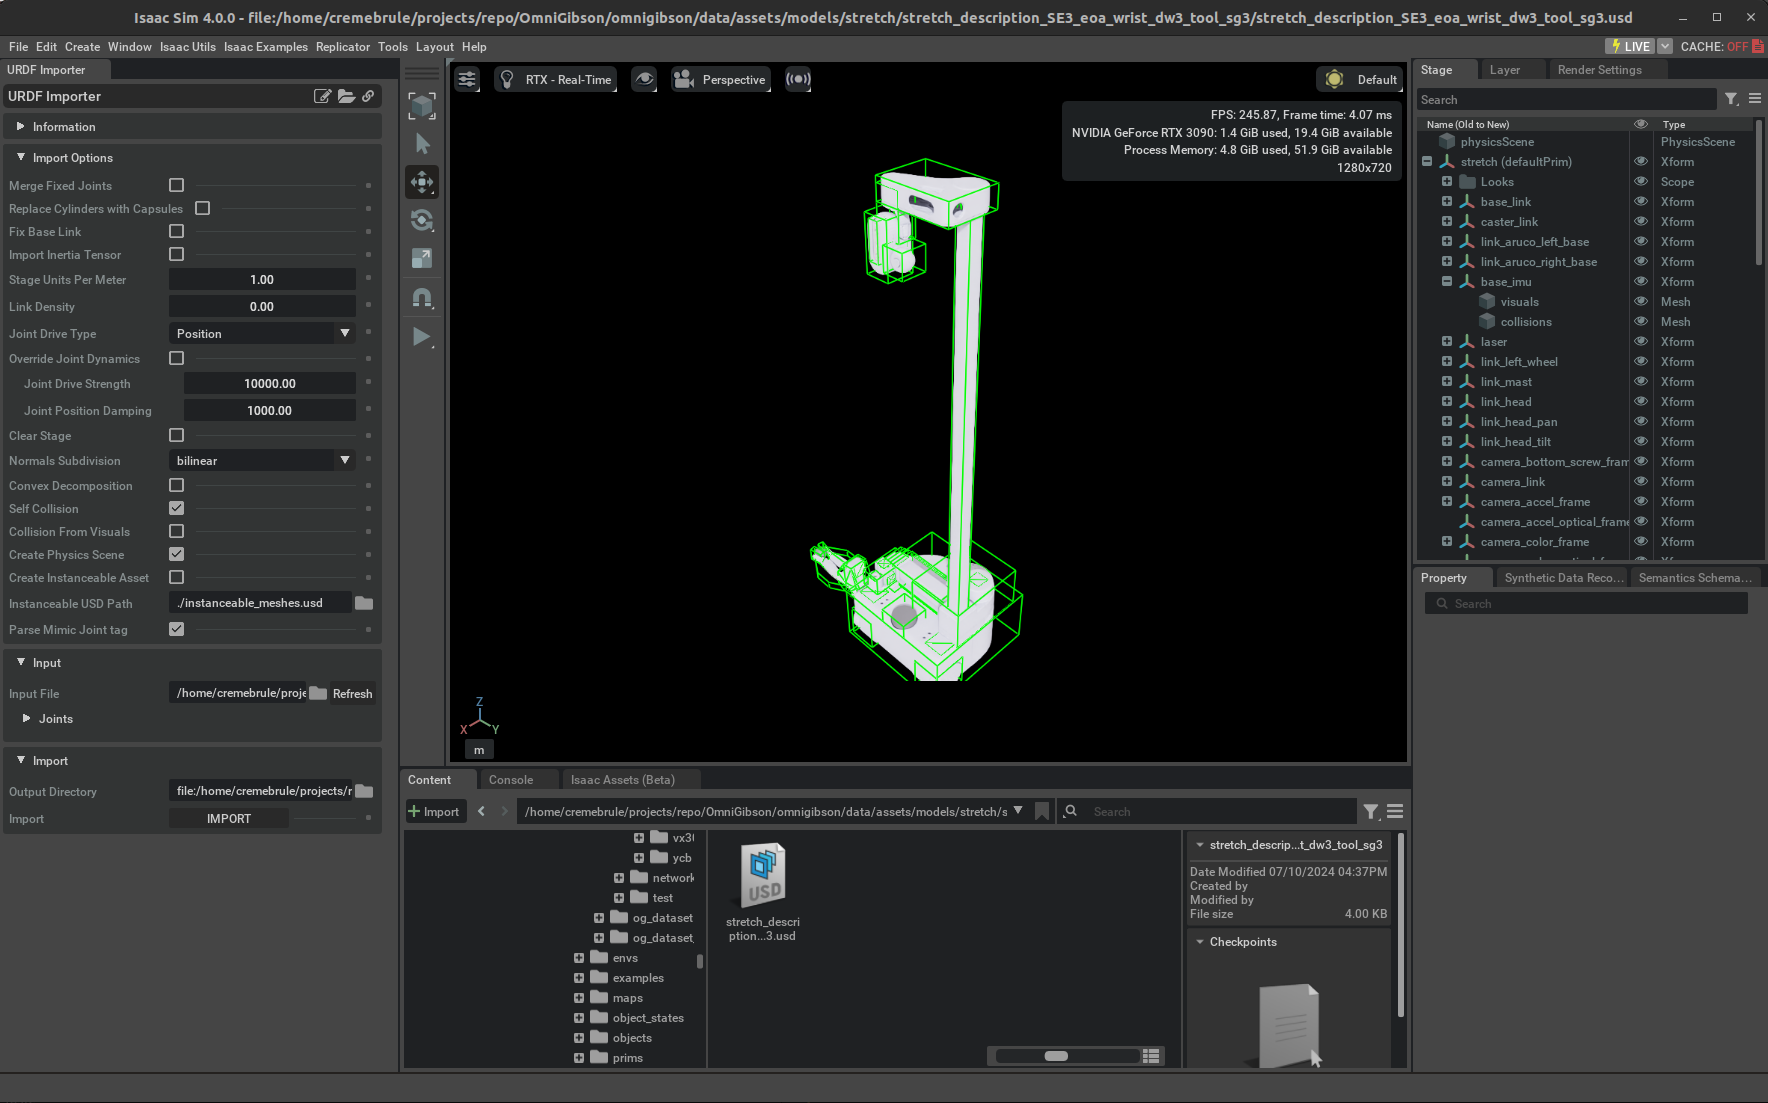
-
Make sure the physics is stable:
-
Create a fixed joint in the base: select the base link of the robot, then right click ->
Create->Physics->Joint->Fixed Joint -
Click on the play button on the left toolbar, you should see the robot either standing still or falling down due to gravity, but there should be no abrupt movements.
-
If you observe the robot moving strangely, this suggests that there is something wrong with the robot physics. Some common issues we've observed are:
-
Self-collision is enabled, but the collision meshes are badly modeled and there are collision between robot links.
-
Some joints have bad damping/stiffness, max effort, friction, etc.
-
One or more of the robot links have off-the-scale mass values.
-
At this point, there is unfortunately no better way then to manually go through each of the individual links and joints in the Stage and examine / tune the parameters to determine which aspect of the model is causing physics problems. If you experience significant difficulties, please post on our Discord channel.
-
-
The robot additionally needs to be equipped with sensors, such as cameras and / or LIDARs. To add a sensor to the robot, select the link under which the sensor should be attached, and select the appropriate sensor:
- LIDAR: From the top taskbar, select
Create->Isaac->Sensors->PhysX Lidar->Rotating - Camera: From the top taskbar, select
Create->Camera
You can rename the generated sensors as needed. Note that it may be necessary to rotate / offset the sensors so that the pose is unobstructed and the orientation is correct. This can be achieved by modifying the
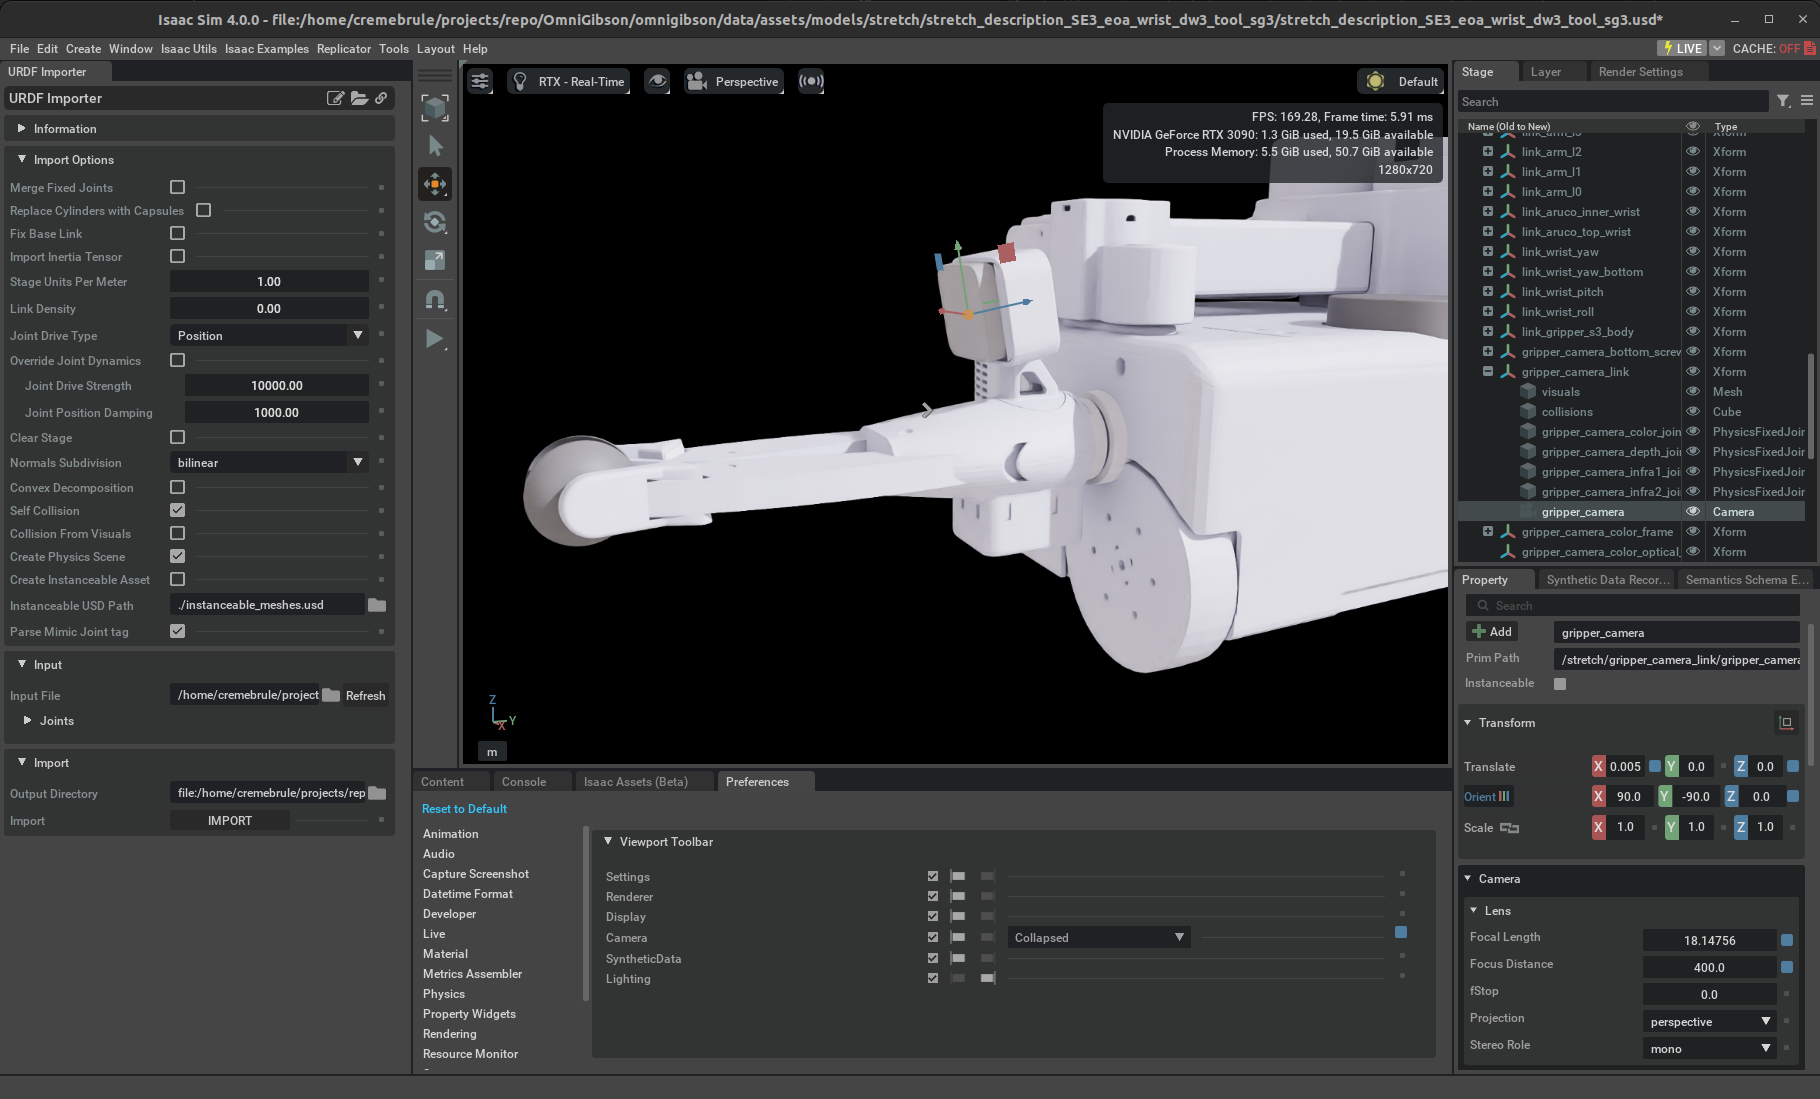
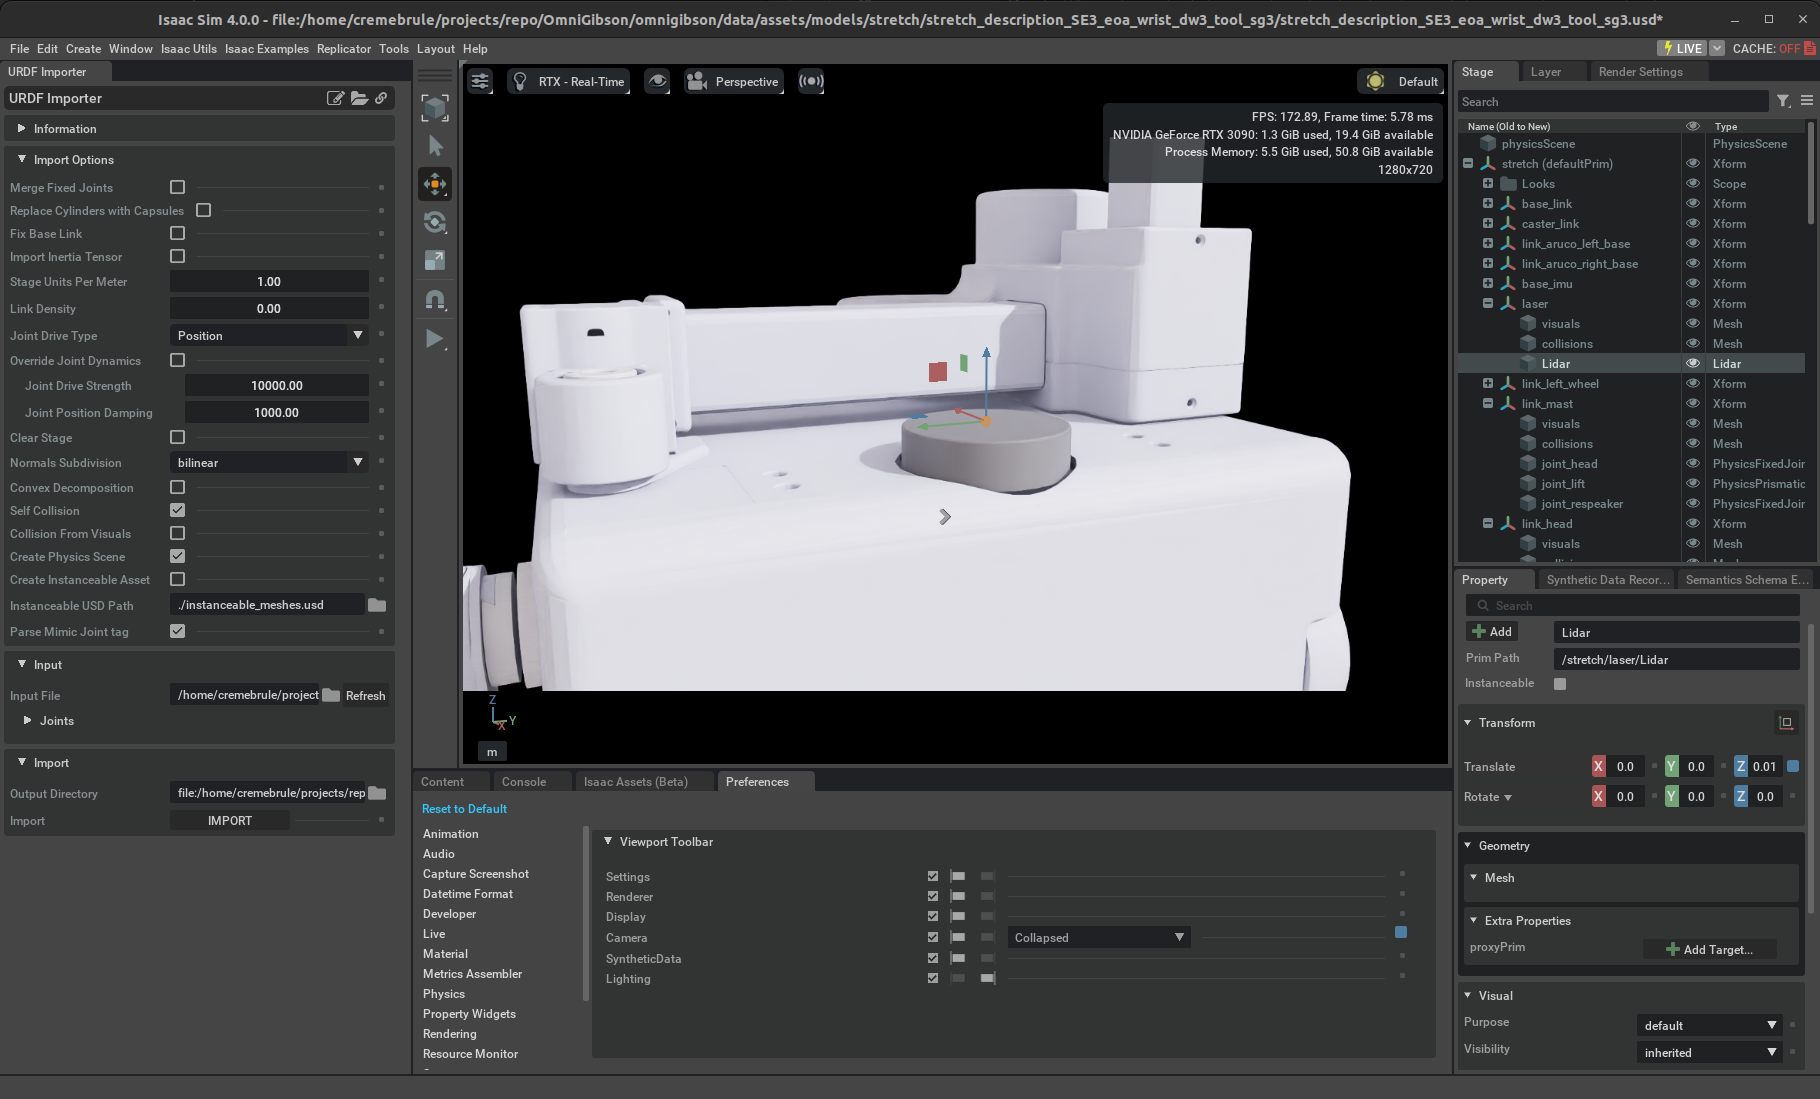
TranslateandRotateproperties in theLidarsensor, or theTranslateandOrientproperties in theCamerasensor. Note that the local camera convention is z-backwards, y-up. Additional default values can be specified in each sensor's respective properties, such asClipping RangeandFocal Lengthin theCamerasensor.In our case, we created a LIDAR at the
laserlink (offset by 0.01m in the z direction), and cameras at thecamera_linklink (offset by 0.005m in the x direction and -90 degrees about the y-axis) andgripper_camera_linklink (offset by 0.01m in the x direction and 90 / -90 degrees about the x-axis / y-axis).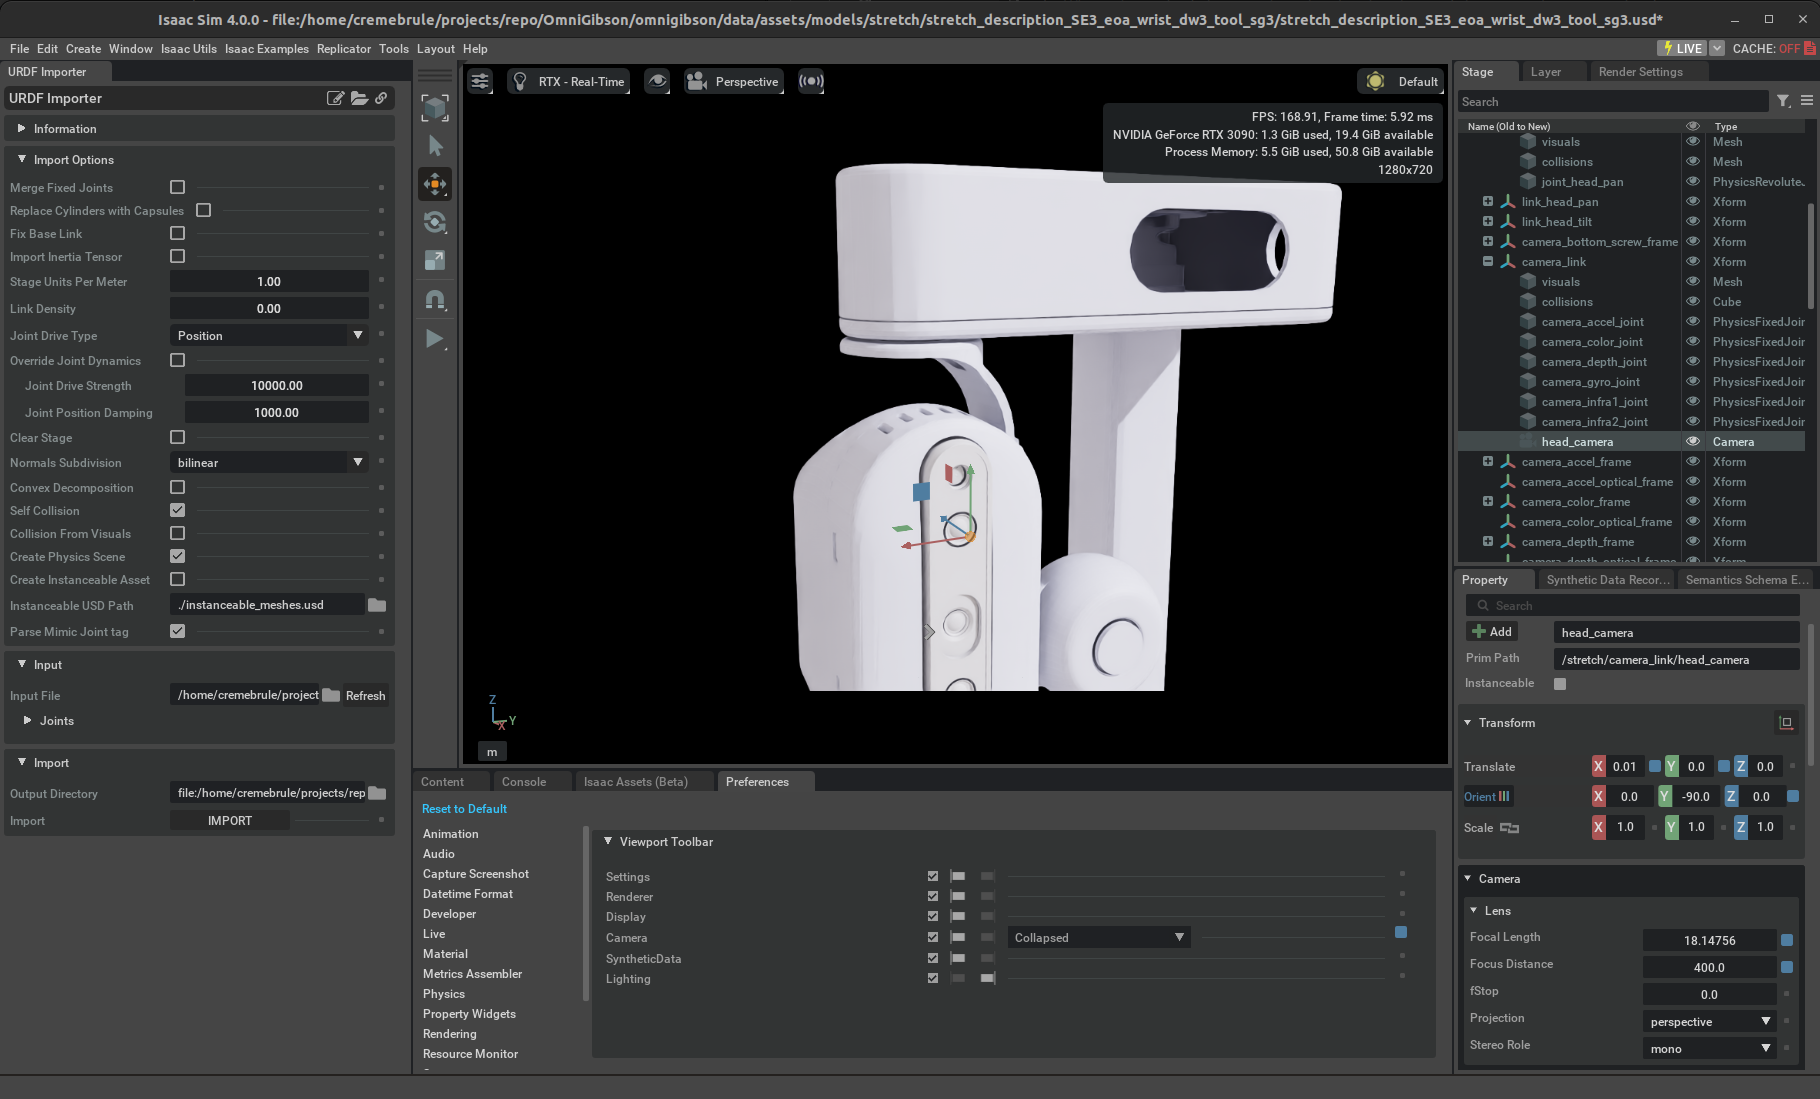
- LIDAR: From the top taskbar, select
-
Finally, save your USD! Note that you need to remove the fixed link created at step 4 before saving.
Create the Robot Class
Now that we have the USD file for the robot, let's write our own robot class. For more information please refer to the Robot module.
-
Create a new python file named after your robot. In our case, our file exists under
omnigibson/robotsand is namedstretch.py. -
Determine which robot interfaces it should inherit. We currently support three modular interfaces that can be used together:
LocomotionRobotfor robots whose bases can move (and a more specificTwoWheelRobotfor locomotive robots that only have two wheels),ManipulationRobotfor robots equipped with one or more arms and grippers, andActiveCameraRobotfor robots with a controllable head or camera mount. In our case, our robot is a mobile manipulator with a moveable camera mount, so our Python class inherits all three interfaces. -
You must implement all required abstract properties defined by each respective inherited robot interface. In the most simple case, this is usually simply defining relevant metadata from the original robot source files, such as relevant joint / link names and absolute paths to the corresponding robot URDF and USD files. Please see our annotated
stretch.pymodule below which serves as a good starting point that you can modify.Optional properties
We offer a more in-depth description of a couple of more advanced properties for ManipulationRobots below:
eef_usd_path: if you want to teleoperate the robot using I/O devices other than keyboard, this usd path is needed to load the visualizer for the robot eef that would be used as a visual aid when teleoperating. To get such file, duplicate the robot USD file, and remove every prim except the robot end effector. You can then put the file path in theeef_usd_pathattribute. Here is an example of the Franka Panda end effector USD:

-
assisted_grasp_start_points,assisted_grasp_end_points: you need to implement this if you want to use sticky grasp/assisted grasp on the new robot.These points are
omnigibson.robots.manipulation_robot.GraspingPointthat is defined by the end effector link name and the relative position of the point w.r.t. to the pose of the link. Basically when the gripper receives a close command and OmniGibson tries to perform assisted grasping, it will cast rays from every start point to every end point, and if there is one object that is hit by any rays, then we consider the object is grasped by the robot.In practice, for parallel grippers, naturally the start and end points should be uniformally sampled on the inner surface of the two fingers. You can refer to the Fetch class for an example of this case. For more complicated end effectors like dexterous hands, it's usually best practice to have start points at palm center and lower center, and thumb tip, and end points at each every other finger tips. You can refer to the Franka class for examples of this case.
Best practise of setting these points is to load the robot into Isaac Sim, and create a small sphere under the target link of the end effector. Then drag the sphere to the desired location (which should be just right outside the mesh of the link) or by setting the position in the
Propertytab. After you get a desired relative pose to the link, write down the link name and position in the robot class.
-
If your robot is a manipulation robot, you must additionally define a description .yaml file in order to use our inverse kinematics solver for end-effector control. Our example description file is shown below for our Stretch robot, which you can modify as needed. Place the descriptor file under
<PATH_TO_OG_ASSET_DIR>/models/<YOUR_MODEL>. -
In order for OmniGibson to register your new robot class internally, you must import the robot class before running the simulation. If your python module exists under
omnigibson/robots, you can simply add an additional import line inomnigibson/robots/__init__.py. Otherwise, in any end use-case script, you can simply import your robot class from your python module at the top of the file.
stretch.py
1 2 3 4 5 6 7 8 9 10 11 12 13 14 15 16 17 18 19 20 21 22 23 24 25 26 27 28 29 30 31 32 33 34 35 36 37 38 39 40 41 42 43 44 45 46 47 48 49 50 51 52 53 54 55 56 57 58 59 60 61 62 63 64 65 66 67 68 69 70 71 72 73 74 75 76 77 78 79 80 81 82 83 84 85 86 87 88 89 90 91 92 93 94 95 96 97 98 99 100 101 102 103 104 105 106 107 108 109 110 111 112 113 114 115 116 117 118 119 120 121 122 123 124 125 126 127 128 129 130 131 132 133 134 135 136 137 138 139 140 141 142 143 144 145 146 147 148 149 150 151 152 153 154 155 156 157 158 159 160 161 162 163 164 165 166 167 168 169 170 171 172 173 174 175 176 177 178 179 180 181 182 183 184 185 186 187 188 189 190 191 192 193 194 195 196 197 198 199 200 201 202 203 204 205 206 207 208 209 210 211 212 213 214 215 216 217 | |
stretch_descriptor.yaml
Deploy Your Robot!
You can now try testing your custom robot! Import and control the robot by launching python omnigibson/examples/robot/robot_control_examples.py! Try different controller options and teleop the robot with your keyboard, If you observe poor joint behavior, you can inspect and tune relevant joint parameters as needed. This test also exposes other bugs that may have occurred along the way, such as missing / bad joint limits, collisions, etc. Please refer to the Franka or Fetch robots as a baseline for a common set of joint parameters that work well. This is what our newly imported Stretch robot looks like in action:
